Create a workflow
A workflow is a Crossflow diagram: a small JSON graph the Task Orchestrator executes to coordinate one or more robots. This page shows how to author one from scratch, then how to send it.
Read the Crossflow handbook
Everything on this page is covered in more depth, in the Crossflow handbook. It is the best place to understand how crossflow and its operations (node, fork_clone, buffer, join, …) work and how to use them properly.
Diagram anatomy
Every diagram has three top-level keys:
| Key | What it is |
|---|---|
version | Diagram schema version (currently "0.1.0"). |
start | The id of the first op to run. |
ops | A map of id → operation. The graph is wired by each op's next. |
An operation has a type. The common ones:
type | Purpose |
|---|---|
node | Does the work. Pick a builder (e.g. MAPFGoToNode, MQTTTaskRequestNode) and a config. |
fork_clone | Splits flow into parallel branches — next is a list of op ids. |
buffer | A wait point that holds a branch's result until a join collects it. |
join | Waits for all listed buffers, then continues. |
next points to the id of the op to run next, or { "builtin": "terminate" } to end a branch.
Node builders and their config
Each node names a builder the orchestrator registers — MAPFGoToNode (AMR move via AMQP), MQTTTaskRequestNode (transfer tasks: liftrack / depalletize / droprack via MQTT), WaitAMRTaskNode, DefaultNode. The config keys differ per builder — see Workflow nodes for each one's parameters.
Example: sequential pickup → dropoff
The simplest useful workflow — one robot drives to a rack, picks it up, drives to a drop location, and puts it down. It chains a MAPFGoToNode (move) and a MQTTTaskRequestNode (transfer) per step:
{
  "version": "0.1.0",
  "start": "drive_to_rack",
  "ops": {
    "drive_to_rack": {
      "type": "node",
      "builder": "MAPFGoToNode",
      "display_text": "Manufacturer_2 -> rack P63",
      "config": {
        "asset_name": "Manufacturer_2",
        "coordinates": "P63",
        "task_type": "amr_mapf",
        "task_id": "demo_drive_rack"
      },
      "next": "liftrack"
    },
    "liftrack": {
      "type": "node",
      "builder": "MQTTTaskRequestNode",
      "display_text": "Manufacturer_2 liftrack",
      "config": {
        "id": "urn:ngsild:Task:demo_liftrack",
        "task_type": "liftrack",
        "task_command": "START",
        "asset_id": "Manufacturer_2",
        "task_params": {},
        "max_retries": 3
      },
      "next": "drive_to_dropoff"
    },
    "drive_to_dropoff": {
      "type": "node",
      "builder": "MAPFGoToNode",
      "display_text": "Manufacturer_2 -> dropoff P300",
      "config": {
        "asset_name": "Manufacturer_2",
        "coordinates": "P300",
        "task_type": "amr_mapf",
        "task_id": "demo_drive_dropoff"
      },
      "next": "droprack"
    },
    "droprack": {
      "type": "node",
      "builder": "MQTTTaskRequestNode",
      "display_text": "Manufacturer_2 droprack",
      "config": {
        "id": "urn:ngsild:Task:demo_droprack",
        "task_type": "droprack",
        "task_command": "START",
        "asset_id": "Manufacturer_2",
        "task_params": {},
        "max_retries": 3
      },
      "next": { "builtin": "terminate" }
    }
  }
}
Reading it: start at drive_to_rack (the AMR moves to rack P63), liftrack picks the rack up, drive_to_dropoff moves to P300, droprack sets it down, then terminate. coordinates must be real map waypoints, and every task_id / id must be unique (see the Task Orchestrator limitations).
Example: parallel multi-robot (fork → join)
To move several robots at once, fork into a branch per robot and join to wait for all of them. Each branch ends in a buffer; the join collects every buffer before it continues. Two robots in the Crossflow editor:
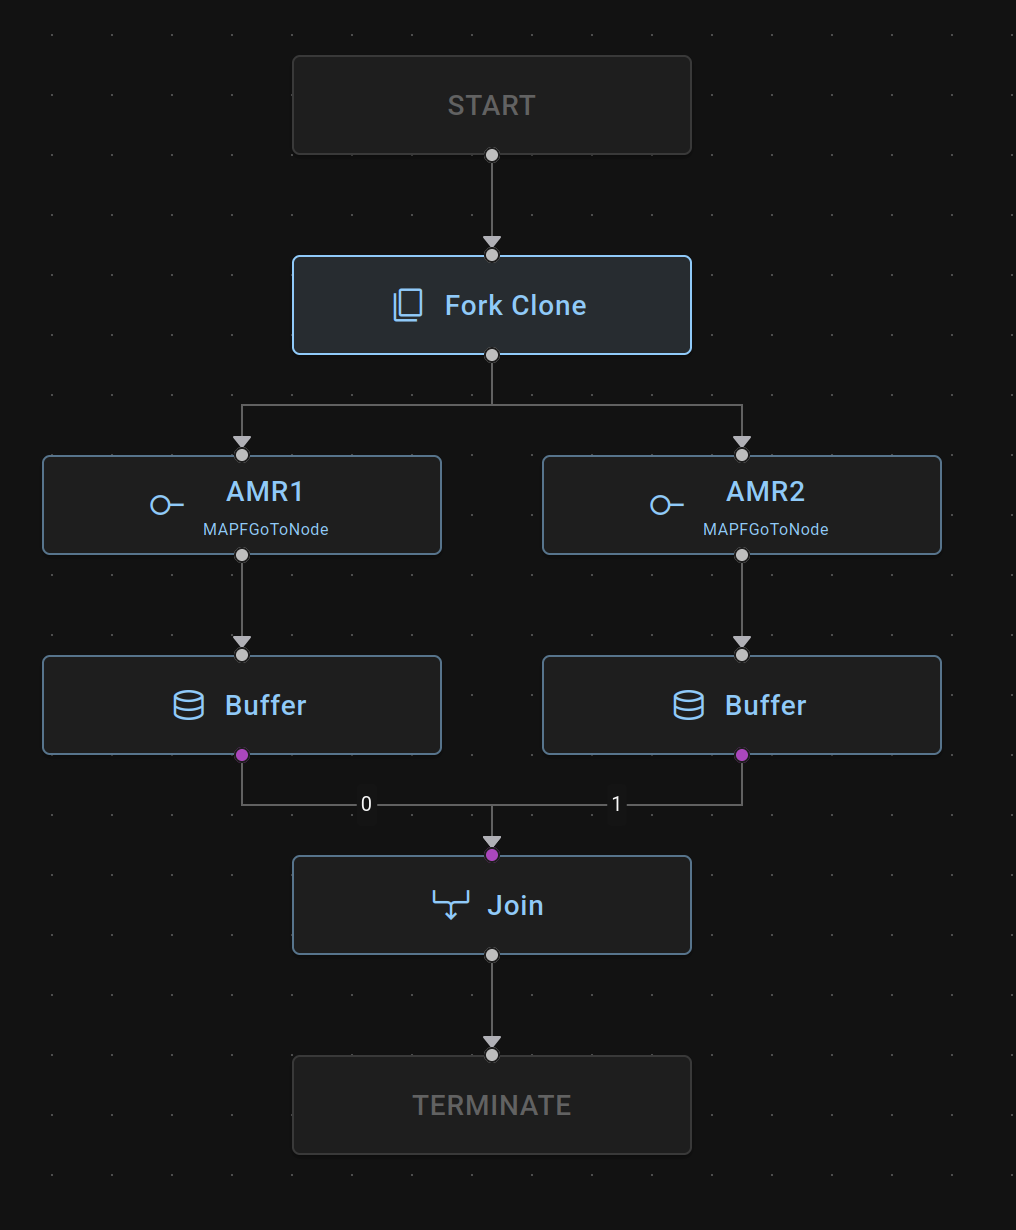
The fork_clone splits flow into one branch per robot (AMR1, AMR2 — both MAPFGoToNode); each branch ends in a buffer, and the join waits for both buffers (inputs 0 and 1) before continuing to terminate.
Generate it instead of hand-writing
For N robots, building this by hand is tedious. The send_parallel_workflow_3_robots.py tester generates the fork/buffer/join ops programmatically — a good template to copy. See Try it directly.
Run it in the editor
Once a diagram is built (or imported) in the Crossflow frontend editor, click the run button to open Run Workflow, then RUN to execute it through the built-in executor.
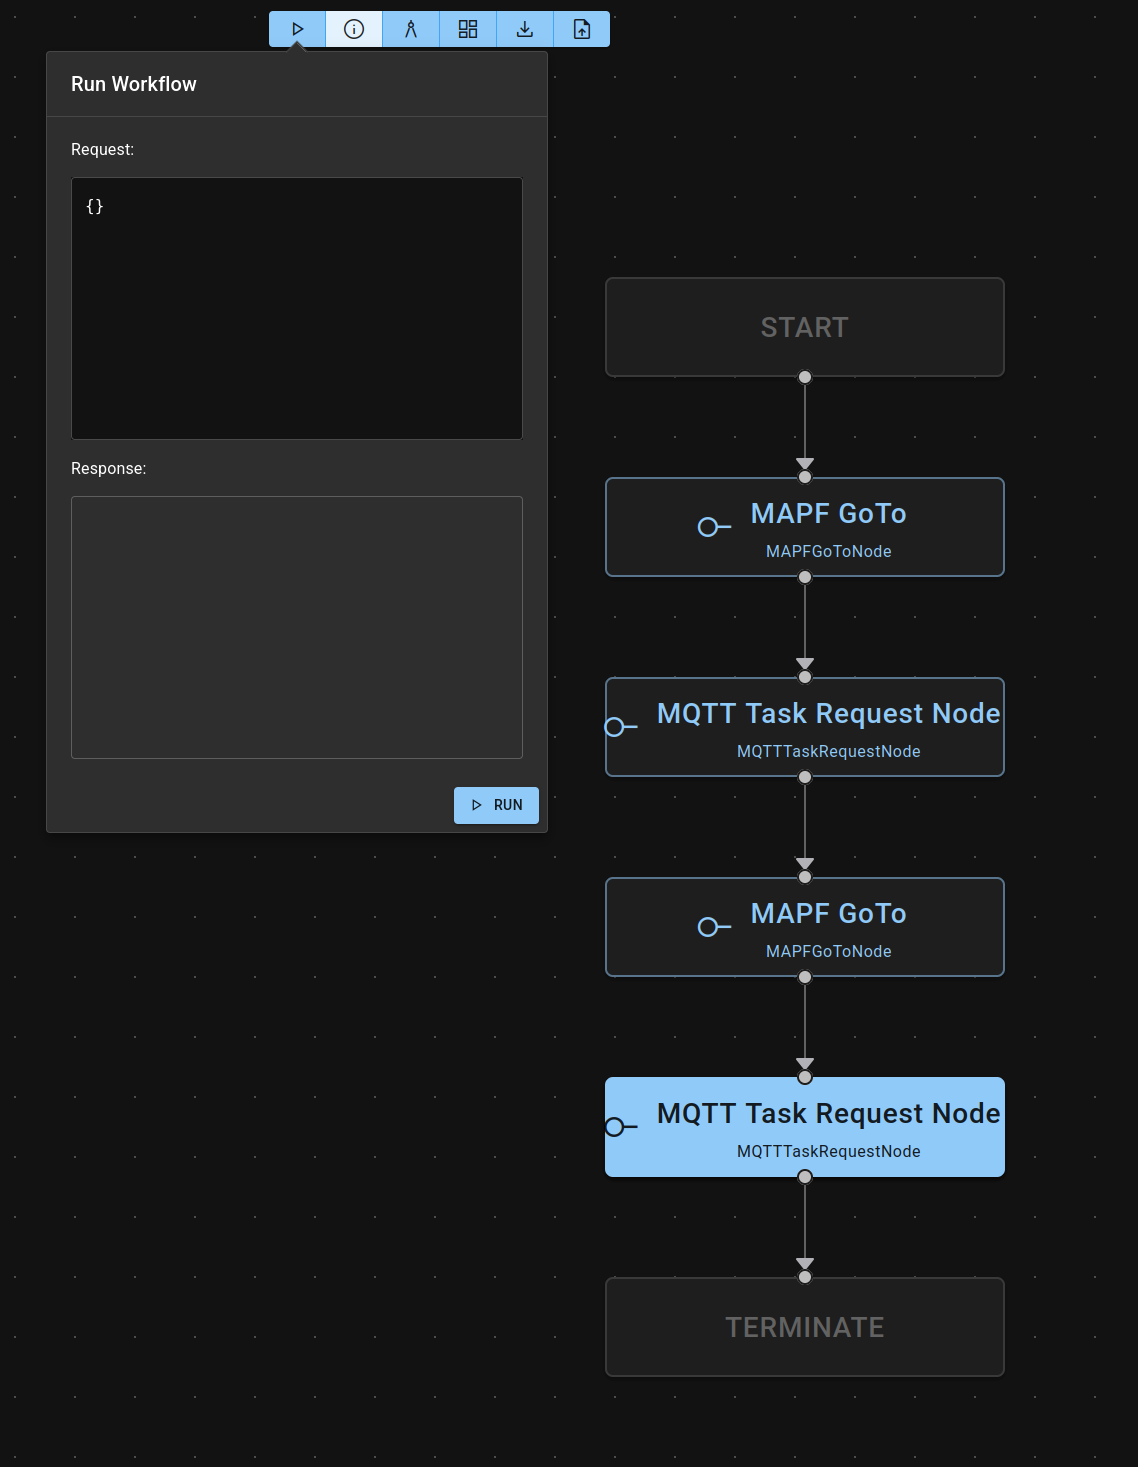
You don't need any request input
Leave the Request field as {}. In this implementation the nodes are self-contained — each one reads everything it needs from its own config (asset, coordinates, task type, …), so upstream inputs are not used and nothing is piped from one node into the next. An empty request runs the whole graph.